

Note: This is just a workaround until Nintex have created a way to add this to their product.
First we need to add an extra action to our Approval actions which involves adding a "Parallel Block" Action along with your approval Action.
On the Left side of the Parallel Block you will add your usual existing "Assign a task". While on the right part of the action we need to add "Loop with Condition" action

Inside the Loop with Condition we need to add a "Query List" action and Query to the "Workflow Task" lists(Where the workflow tasks are stored). While in the Filter Section we need to set the following conditions:

and also we need to set the Maximum number of rows to 1 then output type should be set to "Seperate out per column". I know what running in your mind why do we filter the data we are getting using the Task Name. I will explain later Trust me. Now for the Column to Select choose the Column "ID" and store it in a text variable. We will call this "VariableTaskID".
Now going back to the condition in the Loop with Condition we need to set that the loop will never end until "VariableTaskID" is empty.

Now as promised we need to go back to our question in regard why we need to filter out the taskname. Now I hope you get your answer by doing the following. Go inside your approval task now in the Task Type Add the "Current Item:ID", this will serve as an indicator to our workflow on what the correct Task should we getting.
 |
| Hit Save |
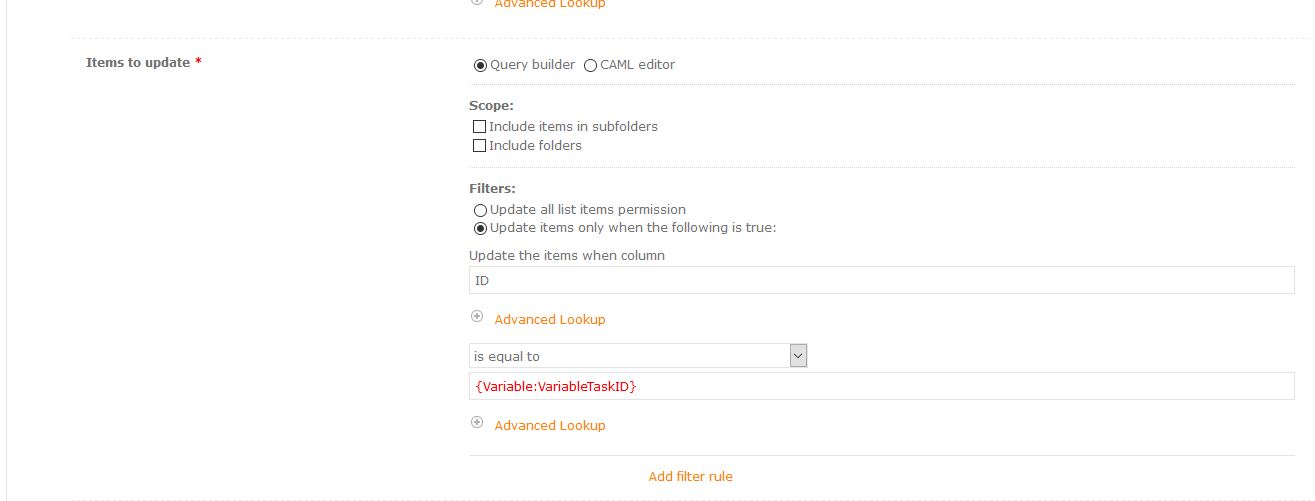
Now once the Loop with Condition has been satisfied(Meaning the VariableTaskID already has a value). We can now set the permission of task using "Office 365 update item permissions" action. Add Office 365 update item permissions after the loop condition. Fill in the cocorrect Destination site URL( I suggest using the "Workflow Context > Current site URL" variable so you it will be dynamic). For the List name set the list name of your Workflow Task, in my sample I add "Workflow Task" as my List Name.

Now for the Filter we need to set the filter to use "Update items only when the following is true" then "ID" as the Condition is equal to our earlier variable (VariableTaskID )
Now for the User set the name of the user which you want to authorized to approve the task. The screenshot will help you how to setup the rest of the the text.

With the following feature this will limit only the approver can view and edit his task. The other user will receive an access denied page when attempting to open the task item. You may return the security of by adding a "Office 365 Update item permissions" in the Approve/Reject outcome.
Please let me know if there is any topic you want to discuss for SharePoint.
No comments:
Post a Comment